 StreamTranslate
Connect a hosted OBS receiver
Caption incoming audio on the cloud server that runs OBS.
Identify the OBS receiver
Find the cloud computer that receives your camera or phone feed. Open OBS there and confirm that the incoming source has both the picture and the microphone sound.
Install on the receiver
Install the StreamTranslate OBS plugin on the computer running the receiving OBS, then restart OBS before the show. If a cloud provider controls installation, ask them to install and load it on that server.
Copy the plugin stream key
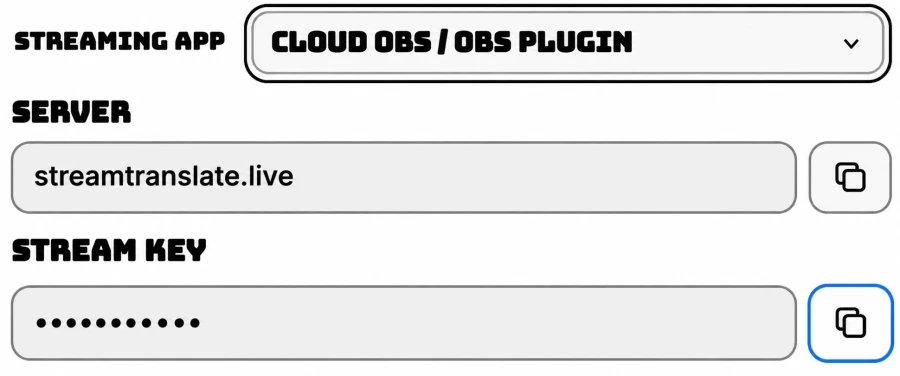
In Control, choose IRL Mode → Cloud OBS / OBS plugin. Set My Spoken Language. If needed, click Generate stream key, then Copy stream key. Use this key in the OBS filter.
Filter the incoming audio source
In the receiving OBS scene, right-click the incoming source whose meter responds to speech. Choose Filters and, under Audio Filters, click + → StreamTranslate. Add it once to that source.
Enter the server and key
In the StreamTranslate filter, set Server to streamtranslate.live and paste the plugin key into Stream key. If the filter is paused, click Start sending audio.
Choose where viewers read captions
For captions in the video, copy your Browser Source URL from Control and add it above the video in OBS. For viewer-selected languages on Twitch, install, activate and link StreamTranslate CC on that channel.
Check audio and captions
Keep Control in IRL Mode. Speak into the filtered source and watch its audio status in OBS. Check the translated sentence in Control and then in the viewer output you chose.
Pause the audio when finished
Open the StreamTranslate filter and click Pause sending audio. Hiding the source or ending the OBS broadcast still leaves the plugin able to send audio.